Master Your Craft: 5 Pro Tips for Using Diamond Painting Trays
Share
 Diamond painting is a beautiful and relaxing hobby that allows you to create stunning, sparkly art. A key tool in your diamond painter's arsenal is the tray, which comes with every kit from reputable supplies like Blinggemart®. While it may seem simple, using the tray effectively can make a huge difference in your experience. Here are five tips and tricks to help you get the most out of your diamond painting trays.
1. Perfect Placement for Precise Picking
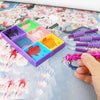
To ensure your drills( the small, colourful resin diamonds) are easy to pick up, pour a single color into the tray without overfilling. Leave enough space so they can move freely. Gently shake the tray side to side, then tap the spout and lightly. This action will align the drills in neat, organized rows, making them easier to pick up with your applicator tool, whether you're using a single placer or a multi-placer.
2. Secure Your Tray for Stress-Free Crafting
If you've ever experienced the frustration of accidentally knocking over your tray, you know how important it is to keep it steady. For those who use an easel, consider attaching a double-sided adhesive pad to the back of the tray. These pads, often used as phone holders in cars, can be found in automotive sections of stores or online. They provide just the right amount of stickiness to hold your tray in place, even on angled surfaces, while still allowing you to remove it easily when needed.
3. Organized and Optimize with Tray Stacking Soulutions
For project that require multiple colors, keeping your workspace tidy is essential. Invest in a diamond painting tray organizer, which can be found online in various designs. These organizers allow you to stack trays filled with different colors, ensuring that all your drills are within reach and neatly arranged. This is especially helpful for intricate designs where switching between colors frequently is necessary.
 4. Break Clumps with Care
Sometimes, drill can arrive clumped together, making them different to work with. Instead of separating them by hand, which can be time-consuming and potentially damaging, place the clumped drills in a tray, cover with another tray, and gently press down. The pressure should cause the drills to separate. If they don't, a slight rub between the two trays should do the trick. This method is quick and preserves the intergrity of the drills.
5. Tackle Static with Simple Solutions
Static electricity can be a nuisance, causing drills to cling together. To combat this, a light mist of anti-static spray can work wonders. Alternatively, store a small piece of dryer sheet with your drills. The dryer sheet reduces static, making the drills easier to handle. For a more hands-on approach, try placing the drills in a freezer bag and rolling them with soft rubber brayer, as suggested by one of our community members. This method is gentle and effective, and if the drills stick to the bag rubbing it with a dryer sheet can help release them.
By incorporating these tips, you'll find your diamond painting sessions more enjoyable and efficient. Remember, the key to a great diamond painting project lies not only in the final result but also in the joy of the process. So, set up your workspace, grab your tools, and let the creative journey begin! Happy crafting!
Remember, the magic of diamond painting is in the details, and with the right techniques, your artwork will shine brighter than ever. Share your own tips and experiences in the comments below, and let's build a community of passionate and skilled diamond painters!
