6 Square Diamond Painting Tips: Taking your Project to the Next Level
Share

Many diamond painters prefer the use of square drills for crafting, or have already dabbled in these process. We've compiled some tips that can help take your projects to the next level. Resin diamond drills, used to create gorgeous mosaic images in diamond painting, come in both round and square shapes, and you can even mix both types of drill to create unique effects. Projects that use square gems tend to be more challenging, such as our mini diamond painting series, which are all based on square. If you enjoy a higher level of challenge, you might want to invest in a proper diamond art kit i of this type.
Round vs. Square Diamonds
Both square and round diamonds are faceted at the top to create a "diamond" effect, while the bottom is flat, making it easier for the gems to sit flush against the diamond canvas. Round diamonds are generally considered easier to work with because you don't need to get each diamond perfectly aligned. Of course, regardless of the shape of the drill, keeping it straight is the key for the best result. However, when suing square diamonds, this will be more noticeable if the drills are not aligned correctly as the edges of the diamonds will be touching. With round diamonds, even if there is a gap between each diamond, it won't matter much because the shape of the diamonds means the edges won't be covered all the way. While square diamonds take some time to get used to , their shape provides stunning detail to the finished canvas. Don't get us wrong, both round and square gems are both incredibly beautiful, each with their own strength, but square diamonds can show more details. If you've never worked with this shape of beads before, it's a good idea to know this before purchasing a square diamond painting kit.

1. Knowing where to place your tray
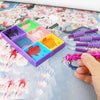
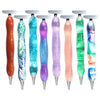
This may seem like a minor detail, but where you decide to place the tray holding the gems can have a big impact on the process. To start a diamond painting project, you will need to use a diamond painting pen and wax to pick up individual drills and carefully place each one in a designated spot on the pattern, also called the drilling field. Since you will have to move the square gems from the tray to the drilling field, it's beneficial to keep the tray aligned with the canvas and close to your work area. This will help you keep the diamonds straight instead of placing them diagonally.

2. Use a Multi-Placer
For more advanced diamond are painters, using a Multi-Placer tool can be a great addition to your coloring process, as it allows you to place multiple diamonds in a row at the same time. While there is a definite learning curve to mastering the use of this diamond painting tool, once you become confident in your multiple placing abilities, you'll see how helpful it is in speeding up the panting process. The multi-placer allows you to set multiple gems at a time, rather than one drill at a time. Investing in one of these handy applicator tips will help you place square drills tightly together, speeding up the whole process.
3. Invest in a Straightening Tool
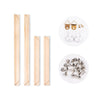
While aligning square drills can take time to master, placing them perfectly and hearing that satisfying "snap" of the drills offers some relaxing ASMR sound. In order to achieve that satisfying sound and make your square drills completely flush with their neighbors, consider using a straightening tool. A straightening tool can be your saving tool because it allows you to simply touch up the placement of row or column of drills, arranging them in a more uniform fashion without any overlap or gaps. These tools help the process for both beginners and experienced crafts alike!
4. Have Extra Tools on Hand
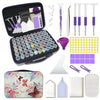
As you become more skilled at diamond art painting, your collection of extra diamonds and wax that were left over from your previous kits will grow. We recommend investing in an organizer, extra putty, and tools in case you are ever in the middle of a project and you lose the last drill in a specific color, or your wax runs out. Having these additional supplies on hand will allow you to work on your project whenever inspiration strikes.
5. Try Tweezers
While a diamond painting pen is the standard tool for placing drills, some crafters swear by tweezers for specific situations. Tweezers offer more precise control, which is especially beneficial for square diamonds. They allow for meticulous drill alignment, minimizing gaps and ensuring a flawless finish. They're also ideal for picking up misplaced or crooked diamonds for adjustments without disturbing surrounding areas.
6.Use the Checkerboard Method
This technique is a game-changer for tackling large sections of a single color in your diamond painting. Instead of meticulously filling row by row, which can lead to inconsistencies and slight deviations, this method breaks it down into smaller, more manageable steps.
Here's how it works: Imagine a checkerboard pattern. You'll be filling the square with two different colors -let's call them color A and color B. Start by placing a square of color A and color B. Continue this pattern, alternating colors in a checkerboard fashion across the entire area you want to fill. This creates a grid of alternating colors.
The fun part lies in the next step. Once you've completed the entire checkerboard the entire checkerboard pattern, go back and fill in the empty squares with the remaining color (either A or B, depending on which one you skipped initially). Placing the remaining diamonds becomes much easier because you've already established a grid wirh alternating colors. The already placed squares act as guides, ensuring straighter lines and minimzing those pesky gaps between drills that can sometimes occur when filling row by row.
Conclusion
Before moving on to a new section, take a moment to double-check your work, especially for any misaligned square or missing diamonds. It's much easier to fix mistakes now than later.
Working with square can elevate your diamond painting projects to new heights of detail and satisfaction. Whether you're a beginner or an experienced painter, the tips we've shared here can help streamline your process and improve your results. From strategic tray placement and using a Multi-Placer for speed, to the precision of a straightening tool and the efficiency of the checkerboard method, there are many ways to make your diamond painting journey more enjoyable. So, grab your tools, unleash your creativity, and watch as your square diamond paintings transform into breathtaking works of art. Happy diamond painting!
